About this Article
This article provides information related to Allowlist modifications, Publishers and Packages.
Allowlist
The Allowlist defines all of the executables that are allowed to execute. The list of executables is populated after the reference host scan. Some of them are auto-allowlisted as per the configuration on Host profile/template. This can be modified or optimized as described in the sections below.
The below table represents the different status values of executable threat intelligence along with their descriptions:
Threat Intelligence Status | Color | Description |
|---|---|---|
Safe | Green | If the executables are verified by the configured Threat Intelligence Service and are safe |
Threat | Yellow | If the executable is marked as a potential threat |
Unverified | Grey | If Threat Intelligence Service is not configured |
Unknown | NA | If the reputation of the executable is not available with the configured Threat Intelligence Service |
Modify at the Profile-level
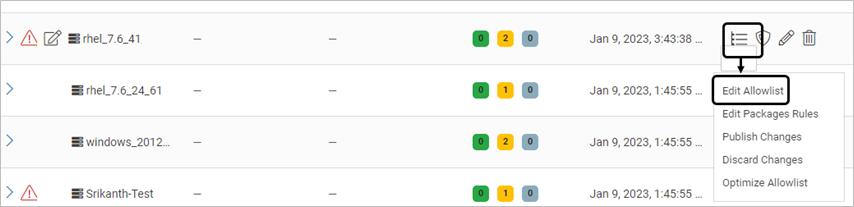
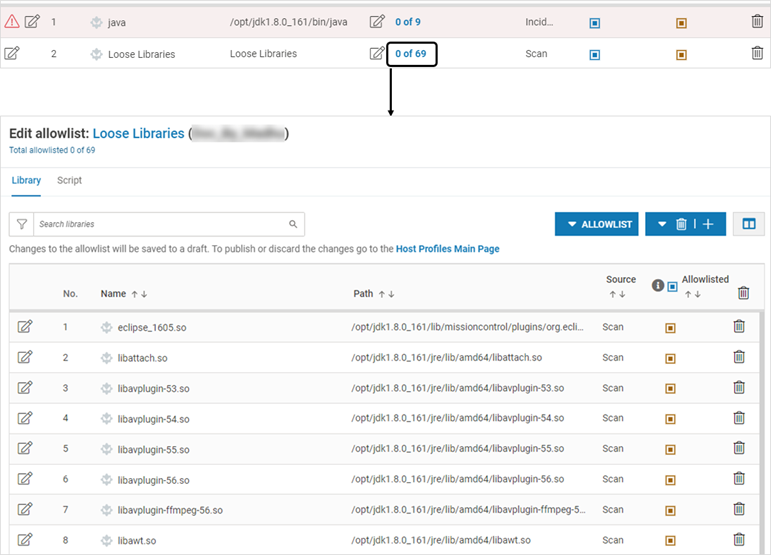
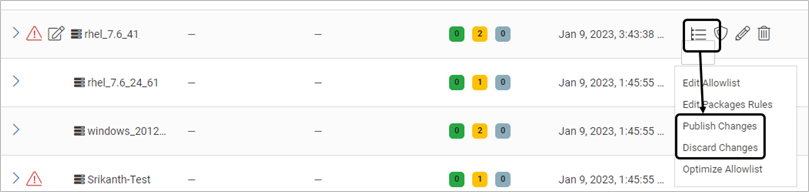
On the Host Monitoring page, expand the profile and click Edit Allowlist
All executables are listed along with their Threat Intelligence, Path, Allowlisted libraries (if any), Source (Scan or Incident), Library Monitoring (Enabled/Disabled) and Allowlist (or not)
The “Not allowlisted” status is depicted below
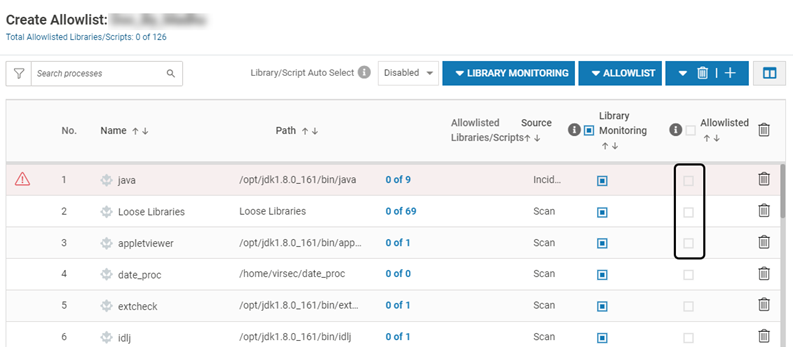
The list displays Threat Intelligence. A mouse-over will display the details
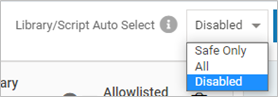
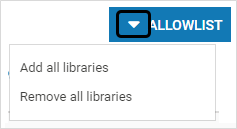
Select the Library/Script Auto Allowlisting option. This enables the automatic allowlisting of Safe only libraries OR all libraries OR none of the libraries depending on the selected drop-down. The Script Auto Allowlisting tab is populated when an ACP is applied to the profile
Select the required processes
Associated Binaries
Click the Allowlisted Binaries entry and select all the required libraries, click Close
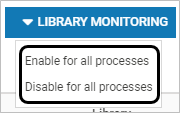
Alternatively, select the appropriate Library Monitoring Option
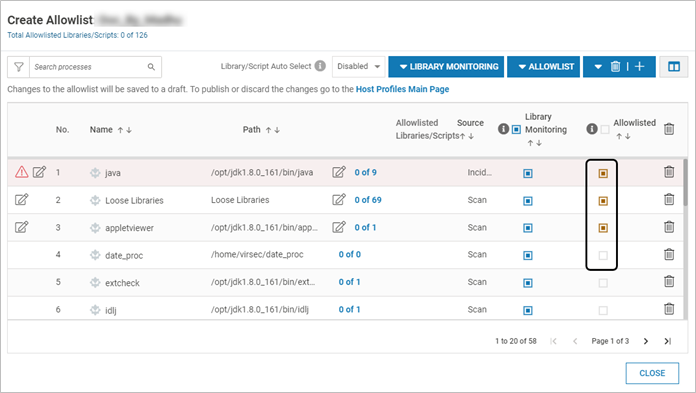
The changed process is indicated as depicted below:
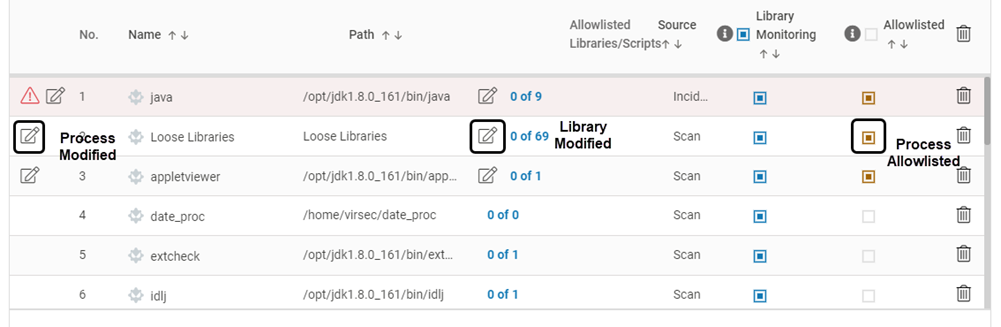
Click the desired Allowlist option. Click YES on the confirmation screen
Publish/Discard the changes using the appropriate option. During the process of publishing, options of edit, delete, protection mode change or host association/disassociation are disabled
NOTE
The library monitoring option is enabled for all the processes unless explicitly disabled on CMS
Modify across Profiles
Execute a search on the Profile List. Select all the required processes to be allowlisted from the search results
Select the appropriate option under LIBRARY MONITORING. This option applies to the search results ONLY
Select the Library/Script Auto Allowlisting option at the top of the page
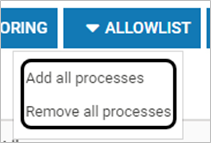
Click the required Allowlist option. Click YES on the confirmation screen. This option applies to the search results ONLY
Alternatively, click the Allowlisted Libraries entry associated with a particular process
Select the required libraries to be allowlisted. Select the appropriate option under ALLOWLIST and click YES on the confirmation screen
Publish/Discard the changes using the appropriate option at the profile level

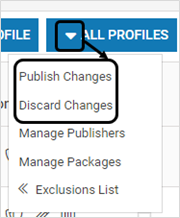
Alternatively, use the below dropdown for bulk publish/discard across profiles
Optimize Allowlist
The Optimize Allowlist option clears/optimizes the allowlist when exclusions are added. Although this clean-up is automated, it can be manually initiated using this option. It ensures that all the matching executables with the global exclusion list are purged from the individual Host Profiles. The corresponding incidents are marked as Acknowledged.
To optimize the existing allowlist, click ALL PROFILES > Exclusions List > Optimize Allowlist
Click YES on the confirmation screen
Publishers (Windows)
VSP provides an option to add a list of Publishers of files (files signed by known publisher) to the allowlist for Windows Probes. When processes with the allowlisted Publishers are launched, they are allowed to execute. Incidents are not reported in CMS for such processes. The list is added with new Publishers using the below sources:
Publishers of files scanned on the hosts when a profile is created
Publishers obtained from VSP detected incidents
Publishers manually added from the CMS
NOTE
[Version 3.0.0 and Above]
Whenever a publisher is allowlisted:
Incidents related to it are auto acknowledged.
Associated executables are no longer listed in the allowlist
A process belonging to allowed publisher may remain in allowlist if there are any libraries or scripts associated with it that are not eligible for removal. These libraries/scripts may be associated with a publisher that is not allowlisted or may not be associated with any publisher
By default, host protection allows binaries with expired Publisher Certificates. To block binaries with expired Publisher Certificate, execute the command:
vsp-cli config hmm edit winCheckExpiration True --persistThe Publishers list can be defined at the global level or profile level.
Global Publishers List
Global Publishers List is applicable to all profiles.
To view the Global List, follow the below steps:
On the Host Monitoring page, navigate to ALL PROFILES > Manage Publishers to view the list of Publishers
Select all the required Publishers and the required option from ACTIONS to allow/not allow Publishers. Any action taken on the global list will impact all the associated profiles. Click YES on the confirmation screen
To add Publishers manually to the global list, follow the below steps:
Click ADD PUBLISHER. Provide the Publisher Name and select Allow/Not Allow option. Click SAVE
Ensure that the exact Publisher name is specified. The name is case-sensitive
Any Publisher added globally is not listed in associated profiles to avoid redundancy. But these global specifications are applied to all the profiles
Profile-level Publishers List
Profile-level Publishers List is applicable to a particular profile.
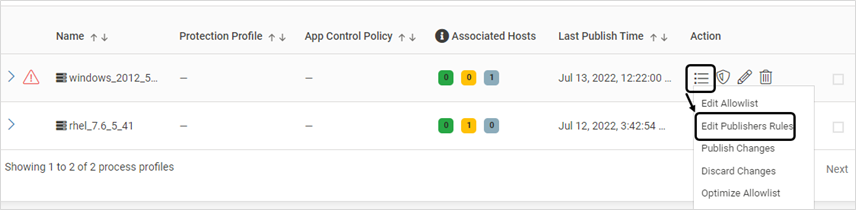
To view the Publishers list of a profile, click Edit Publishers Rules
Select all the required Publishers and the required option from ACTIONS to allow/not allow Publishers. Any action taken on the global list will impact all the associated profiles. Click YES on the confirmation screen
To add Publishers manually to the profile list, follow the below steps:
Click ADD PUBLISHER. Provide the Publisher Name and select Allow/Not Allow option. Click SAVE
Ensure that the exact Publisher name is specified. The name is case-sensitive. Addition is at the Profile level only
Global Publishers List
Global Publishers List is applicable to all profiles.
To view the Global List, follow the below steps:
On the Host Monitoring page, navigate to ALL PROFILES > Manage Publishers to view the list of Publishers
Select all the required Publishers and the required option from ACTIONS to allow/deny Publishers. Any action taken on the global list will impact all the associated profiles. Click YES on the confirmation screen
To add Publishers manually to the global list, follow the below steps:
Click ADD PUBLISHER. Provide the Publisher Name and select Allow/Deny option. Click SAVE
Ensure that the exact Publisher name is specified. The name is case-sensitive
Any Publisher added globally is automatically listed in associated profiles
The manually added Publishers can be deleted
Profile-level Publishers List
Profile-level Publishers List is applicable to a particular profile.
To view the Publishers list of a profile, click Edit Publishers Rules
Select all the required Publishers and the required option from ACTIONS to allow/deny Publishers. Any action taken on the global list will impact all the associated profiles. Click YES on the confirmation screen
To add Publishers manually to the profile list, follow the below steps:
Click ADD PUBLISHER. Provide the Publisher Name and select Allow/Deny option. Click SAVE
Ensure that the exact Publisher name is specified. The name is case-sensitive. Addition is at the Profile level only
The manually added Publishers can be deleted. Deletion is also at the Profile level only
Packages (Linux)
VSP provides an option to add a list of file Packages (RPM and DEB packages) to the allowlist for Linux Probes. When processes with the allowlisted Packages are launched, they are allowed to execute. Incidents are not reported in CMS for such processes. The list is added with new Packages using the below sources:
File Packages scanned on the hosts when a profile is created
File Packages obtained from VSP detected incidents
File Packages manually added from CMS
NOTE
[Version 3.0.0 and Above]
Whenever a package is allowlisted:
Incidents related to it are auto acknowledged.
Associated executables are no longer listed in the allowlist
A process belonging to allowed package may remain in allowlist if there are any libraries or scripts associated with that it that are not eligible for removal. These libraries/scripts may be associated with a package that is not allowlisted or may not be associated with any package
The Packages list is considered only if the option Scan Complete File System is selected during profile creation.
The Packages list can be defined at the global level or profile level.
Global Package List
Global Packages List is applicable to all profiles.
To view the Global List, follow the below steps:
On the Host Monitoring page, navigate to ALL PROFILES > Manage Packages to view the list of Packages
Select all the required Packages and the required option from ACTIONS to allow/not allow Packages. Any action taken on the global list will impact all the associated profiles. Click YES on the confirmation screen
To add Packages manually to the global list, follow the below steps:
Click ADD PACKAGE. Provide the Package Name and select Allow/Not Allow option. Click SAVE
Ensure that the exact Package name is specified. The name is case-sensitive
Any Package added globally is not listed in associated profiles to avoid redundancy. But these global specifications are applied to all the profiles
Profile-level Package List
Profile-level Package List is applicable to a particular profile.
To view the Packages list of a profile, click Edit Packages Rules

Select all the required Packages and the required option from ACTIONS to allow/not allow Packages. Any action taken on the global list will impact all the associated profiles. Click YES on the confirmation screen
To add Packages manually to the profile list, follow the below steps:
Click ADD PACKAGE. Provide the Package Name and select Allow/Not Allow option. Click SAVE
Ensure that the exact Package name is specified. The name is case-sensitive. Addition is at the Profile level only
Global Package List
Global Packages List is applicable to all profiles.
To view the Global List, follow the below steps:
On the Host Monitoring page, navigate to ALL PROFILES > Manage Packages to view the list of Packages
Select all the required Packages and the required option from ACTIONS to allow/deny Packages. Any action taken on the global list will impact all the associated profiles. Click YES on the confirmation screen
To add Packages manually to the global list, follow the below steps:
Click ADD PACKAGE. Provide the Package Name and select Allow/Deny option. Click SAVE
Ensure that the exact Package name is specified. The name is case-sensitive
Any Package added globally is automatically listed in associated profiles
The manually added Packages can be deleted
Profile-level Package List
Profile-level Package List is applicable to a particular profile.
To view the Packages list of a profile, click Edit Packages Rules
Select all the required Packages and the required option from ACTIONS to allow/deny Packages. Any action taken on the global list will impact all the associated profiles. Click YES on the confirmation screen
To add Packages manually to the profile list, follow the below steps:
Click ADD PACKAGE. Provide the Package Name and select Allow/Deny option. Click SAVE
Ensure that the exact Package name is specified. The name is case-sensitive. Addition is at the Profile level only
The manually added Packages can be deleted. Deletion is also at the Profile level only