- 12 Apr 2024
- 4 Minutes to read
- Print
- DarkLight
- PDF
CMS Installation on VM
- Updated on 12 Apr 2024
- 4 Minutes to read
- Print
- DarkLight
- PDF
Installation
To install CMS on VM, follow the one of the below methods:
- Create a new directory to copy the installableShell
mkdir /var/cms cd /var/cms - Download the script file vsp_cms_installer.sh from the Artifactory directory: vsp > releases > public <Major_Release> > <Minor_Release> > <Patch_Version> > vsp_installers
- Example: vsp > releases > public > 3 > 3.0 > 3.0.0-RC5 > vsp_installers
- Execute the below commands and provide artifactory credentials when prompted:
./vsp_cms_installer.sh
- Execute the below command to complete the installation:Shell
cd cms-vm/cms-deploy ./setup.sh -h #To view more information about the script usage ./setup.sh <CMS_HOST_IP_Adress> - The required parameter for the script is:
Parameter Description HOST_IP IP Address of the VM where CMS package is installed - The Optional Parameters are provided below:
Parameter Description SSL_VERIFY Provide 0 to disable SSL hostname verification between CMS and Probe. This is useful when a customized domain name is desired for CMS (Default Domain Name: int.cms.virsec.com). Ensure that the option is disabled for ECS Fargate.
Provide 1 to enable SSL hostname verification. The option is enabled by default-e Public IP Address or DNS name to be used to access CMS UI -f Defines the CMS Deployment type. Allowed Values:
small: Only the core CMS services are installed. Recommended for POVs only
large: The core and optional CMS services are installed. If not specified, the default option is largeIn the configuration small, the below optional services are not installed:
- jreports-service – Reports are scheduled and generated in this service
- licenseserver – This service is the on-prem license server
- organization-service – Provides communication with the VSP MSSP instance
- report-service - Provides CMS Reporting functionality
- ticket-zendesk-service - Provides the ability to configure the ticketing service Zendesk
- virsec-api-snap-service – Provides the capability to access CMS information through SNAP API
- vsp-log-manager-service – Responsible for the logging functionality
-k Ensure that CMS is not running during usage. Allowed Kafka options:
1: For One-way SSL where the Client verifies the Server
NOTE:
2: For Two-way SSL where both the Client and Server verify each other. By default, the value is set is 2 if not specified
If there is a Custom DNS for Kafka listener, then use the option 1 for Kafka. Do not use the option 2
Restart the probe after CMS and/or probe upgrade or when the Kafka mode is modified-P Provide this parameter to select the optional services that need to be started in case of CMS Deployment Type - large. If this option is not provided, all the optional services are started by default. When prompted, provide y/n for optional services [Ticketing Service (Zendesk), Centralized Logging System, MSSP, VSP APIs, Reporting Feature, On-premise License Server] -x Custom advertised listener for Kafka -Z Custom directory containing the LFR certification files - lft.crt and lfr.key NOTEIf a proxy server with SSL (for internet access) OR LDAP server with SSL (for user management) is configured, ensure that the root certificate information is added to the property file, as described in the Deploy Custom SSL Certificate section of the Maintenance article - In cases where RAM settings for small and large CMS deployment types need modifications, execute the below command before CMS deployment and modify the value as required:NOTEThe file ff-ram-size.csv contains VSP-recommended RAM values for the available CMS deployment types. Any change in these values may affect CMS functioning
sudo bash
cd /var/cms/form-factors
vi ff-ram-size.csv
Verification
- Execute the below commands to validate CMS installationShell
cd docker-compose-files watch ./status.sh - Once the status of the cms-client service moves to healthy, CMS UI can be accessed using the URL: https://<CMS_IP_Address>
CMS Onboarding
Once VSP CMS is installed, the onboarding process must be completed. It is a 5-step process to create a Super Admin user and complete the basic configuration. This article provides information about each step in the onboarding process.
Access the CMS using the URL: https://<CMS_IP_Address>
STEP 1: Register Organization - Provide information related to your organization
STEP 2: Register Super Admin - Provide information about the new user to be created with Super Admin privileges. Ensure that the password meets the below criteria
- Length – 15 characters
- Must contain a minimum of one uppercase letter, one lowercase letter, one digit and a special character
- Allowed special characters are: ! ” # $ & ‘ ( ) * , - . / : ; < = > ? @ [ ] ^ _ ` { | } ~
STEP 3: Configure License Server - This step may be skipped at this stage and configuration can be completed at any time through the CMS. Two types of license servers can be configured:
- On-Prem - When the license server is installed on the premises
- Cloud - Uses the cloud license server URL
STEP 4: Configure Email Server - This step may be skipped at this stage and configuration can be completed at any time through the CMS. External or Internal Email Server can be configured. Ensure that for an AWS environment, only the External Email Server is configured
STEP 5: EULA Agreement - Review and accept the End User License Agreement
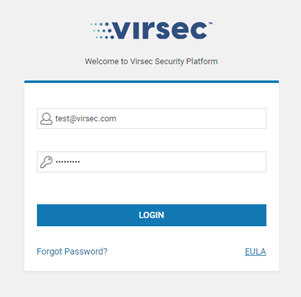
Once all the five steps are completed, the configuration summary is displayed. The login page is displayed. Log in to the CMS using the configured Super Admin credentials

