CMS Installation on Kubernetes
- 21 Jan 2025
- 6 Minutes to read
- Print
- DarkLight
- PDF
CMS Installation on Kubernetes
- Updated on 21 Jan 2025
- 6 Minutes to read
- Print
- DarkLight
- PDF
Article summary
Did you find this summary helpful?
Thank you for your feedback!
About this Article
This article provides the installation, verification and onboarding steps for CMS deployment on Kubernetes.
Installation
To install CMS on Kubernetes, follow the below steps:
On the Kubernetes Management Node, install LFR following the below steps:
vsp_lfr.tar.gz from the below Artifactory directory and install LFR using the below commands:
Version 2.8 and Above: vsp > releases > public <Major_Release> > <Minor_Release> > <Patch_Version>
Example: vsp > releases > public > 2 > 2.8 > 2.8.0Version 2.7: vsp > releases > public > <Release_Number>
Example: vsp > releases > public > 2.7.0tar -xvzf vsp_lfr.tar.gz cd lfr ./vsp_deploy_lfr.sh -h #To view more information about the script usage ./vsp_deploy_lfr.sh
The optional arguments are:
Parameter
Description
-c
For LFR Cleanup. This deletes the LFR Service and the previously created pvc
-d
Use this option to keep the LFR container alive for debugging. Allowed values are
0: To not keep it alive when an error occurs. Default value is 0
1: To keep it alive always-i
VSP Artifactory Identity Token. It is required only if MFA is configured on Artifactory
-p
VSP Artifactory password
-P
Desired LFR Port. Default value is
Version 2.8 and Above: 8443
Version 2.7: 80-R
Use this option to Resync check VSP LFR. Allowed values are
0: To stop Resynching check
1: To enable Resynching check. Default is 1-r
VSP Release Version. Default is vsp/engineering/corbett/corbett.int6
-s
Option to stop VSP LFR
-t
LFR timeout in seconds. Default value is 1800
-u
VSP Artifactory username
-U
VSP Artifactory url. Default url is https://artifacts.virsec.work/artifactory
-v
Verbosity level. Allowed values are 0 or 1. Default is 0
-Z
Custom Certificate Directory
NOTE:
Directory should contain files named "lfr.crt" and "lfr.key"Parameters for Synching Specific OS Packages
-C
To update all CMS files
-O
OS names [Comma separated list without spaces]
Options: alpine | amazonlinux | debian | rpm | suse | windows
Example 1: -O "alpine"
Example 2: -O "alpine,debian,rpm"
Default: All-V
OS Version [Comma separated list without spaces]
Options for different OS:
alpine: 3.6 | 3.7 | 3.8 | 3.9 | 3.10 | 3.11 | 3.12 | 3.13
amazonlinux: 1 | 2
debian: 9 | 10 | 16.04 | 18.04 | 20.04
rpm: 6.5 | 6.7 | 7 | 8
windows: 2003 | 2008 - 12R1 | 2012R2 - 19
Default: All-S
SKU [Comma separated list without spaces]
Options: host | memory | web
Default: AllVerification- Execute the below command to view the installed VSP services
kubectl get service -n virsecAccess the above LFR IP address using any browser. Navigate to the directory vsp to view the refreshed list of files
For CMS installation, execute the below commands on the Kubernetes Management Node:
Version 2.8 and Above:
cd /home/virsec
mkdir -p vsp/cms
cd vsp/cms
wget --no-check-certificate https://<LFR_IPAddress>:8443/vsp/vsp_download_files.sh
chmod +x ./vsp_download_files.sh
./vsp_download_files.sh   #To download the required installable
cd cms_serviceperpod
./vsp_deploy_cms.sh -h    #To view more information about the script usage
Version 2.7:
cd /home/virsec
mkdir -p vsp/cms
cd vsp/cms
wget http://<LFR_IPAddress>/vsp/vsp_download_files.sh
chmod +x ./vsp_download_files.sh
./vsp_download_files.sh   #To download the required installable
cd cms_serviceperpod
./vsp_deploy_cms.sh -h    #To view more information about the script usage
The CMS URL is provided at the end of the execution
The various optional arguments accepted by the script vsp_deploy_cms.sh are:
Parameter
Description
-C
Node name where Client service must be deployed (CMS UI)
-K
Node name where Kafka service must be deployed
-M
Node name where Mongo service must be deployed
-n
DO NOT utilize this parameter to provide a namespace. CMS MUST be deployed in the default namespace virsec
-R
Node name where Redis service must be deployed
-c
For CMS Uninstall – This deletes all the CMS deployments and services, including the infrastructure services (MongoDB, Kafka and Redis containers). When CMS is reinstalled, Probes might need reconfiguration as the CMS IP address might have changed
-k
Use this option during CMS installation/startup/ upgrade. Allowed Kafka options:
0: For Unsecure Kafka connection. The option is available only for Version 2.7. By default, the value is set to 0 if not specified.
1: For One-way SSL where the Client verifies the Server
2: For Two-way SSL where both the Client and Server verify each other.
Version 2.8 and Above: By default, the value is set to 2 if not specified.-o
To install the optional CMS services. Indicate with “Y” or “N” for each of the options
-S
For a clean CMS setup. This deletes the previous setup (if any) including the infrastructure services (MongoDB, Kafka and Redis containers). This option can be used if the core CMS services and infrastructure services need updates
-s
For a clean CMS setup. This deletes the previous setup (if any) excluding the infrastructure services (MongoDB, Kafka and Redis containers). This option can be used if only the core CMS services need updates
NOTE:
Ensure that when the parameters -s,-S OR -c are utilized, only one of them is provided as per the requirement
Provide -s OR -S as the parameter in AWS EKS setup. Do not use the parameter -c-x
To expose VSP Kafka service externally. Kafka Service must be exposed externally only when the Applications are deployed on a different Kubernetes Cluster than VSP CMS
-u
To disable SSL hostname verification between CMS and Probe. This is useful when a customized domain name is desired for CMS (Default Domain Name: int.cms.virsec.com)
-Z
When CMS services are running. Allowed Kafka options:
0: For Unsecure Kafka connection. The option is available only for Version 2.7. By default, the value is set to 0 if not specified
1: For One-way SSL where the Client verifies the Server
2: For Two-way SSL where both the Client and Server verify each other.
Version 2.8 and Above: By default, the value is set to 2 if not specified
To ensure that the CMS maintains the same IP Address and Worker Node, execute the below commands:
kubectl -n virsec patch deployments vsp-cms-client -p '{"spec": {"template": {"spec": {"nodeSelector": {"kubernetes.io/hostname": ""}}}}}'
kubectl -n virsec patch service vsp-cms -p '{"spec" : {"type": "LoadBalancer", "externalIPs":[""]}}'
NOTE
If a proxy server with SSL (for internet access) OR LDAP server with SSL (for user management) is configured, ensure that the root certificate information is added to the property file, as described in the Deploy Custom SSL Certificate section of the Maintenance article
Verification
Execute the below command on the Kubernetes Management Node to list all the deployments and pods
kubectl get pods –n virsecCMS Onboarding
Once VSP CMS is installed, the onboarding process must be completed. It is a 5-step process to create a Super Admin user and complete the basic configuration. This article provides information about each step in the onboarding process.
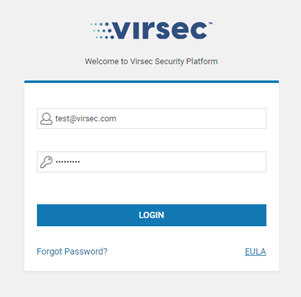
Access the CMS using the URL: https://<CMS_IP_Address>
STEP 1: Register Organization - Provide information related to your organization
STEP 2: Register Super Admin - Provide information about the new user to be created with Super Admin privileges.
Versions 2.8 and Above: Ensure that the password meets the below criteria
Length – 15 characters
Must contain a minimum of one uppercase letter, one lowercase letter, one digit and a special character
Allowed special characters are: ! ” # $ & ‘ ( ) * , - . / : ; < = > ? @ [ ] ^ _ ` { | } ~
STEP 3: Configure License Server - This step may be skipped at this stage and configuration can be completed at any time through the CMS. Two types of license servers can be configured:
On-Prem - When the license server is installed on the premises
Cloud - Uses the cloud license server URL
STEP 4: Configure Email Server - This step may be skipped at this stage and configuration can be completed at any time through the CMS. External or Internal Email Server can be configured. Ensure that for an AWS environment, only the External Email Server is configured
STEP 5: EULA Agreement - Review and accept the End User License Agreement
Once all the five steps are completed, the configuration summary is displayed. The login page is displayed. Log in to the CMS using the configured Super Admin credentials
Was this article helpful?