About this Article
This article provides an overall view about the types of CMS Users.
CMS User Types
VSP 3.1.x and Above:
There are three types of users in CMS:
IDP Users- An existing IDP can be configured with CMS during Onboarding, by providing the required information in the JIRA request raised for the new SaaS instance
This configuration allows users to log in to CMS using their domain credentials
Roles in CMS are assigned based on their roles in IDP. The roles mapping information is also a part of the JIRA request. When a user logs in to CMS, the user is assigned the mapped CMS role based on the IDP role
Auth0 Users - If an IDP setup does not exist or is not desired, then Users can be managed in Auth0 (bundled with VSP) as Local SSO configuration
During CMS onboarding, only one user information is included in the JIRA request
The first name, last name and Email ID information of the required users must be provided to the Virsec representative after CMS SaaS instance is available
First Time Password Setup:
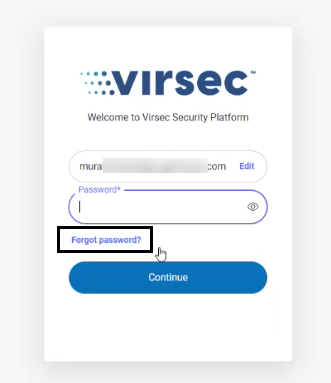
Once a user is added in Auth0, use the Virsec-provided URL and click Continue
Click Forgot Password?

A link for password reset is sent through email. Set the password using the link
Log in to the CMS using the Email ID and newly set password
Local CMS Users – These users are created and maintained in CMS. Such users are very useful in test environments
This feature can also be leveraged as a fallback mechanism
It is also utilized in cases where an existing CMS instance is upgraded from a previous version to 3.1.0 and the existing users are migrated to the new SaaS instance
During initial CMS Onboarding after installation, a Super Admin user is created
Click here for more information
VSP 3.0.x and Below:
There are three types of users in CMS:
Local CMS Users – These users are created and maintained in CMS. This type of users is very useful in test environments
This feature can also be leveraged as a fallback mechanism
During initial CMS Onboarding after installation, a Super Admin user is created
Click here for more information
LDAP/AD Users – In a compliance environment, it is desirable to have all authentication from AD and not from a local, isolated authentication. This aids in maintaining authentication audit records
The default role is assigned to the user. The user role may be modified as required by the Super Admin user
Once a user is imported in CMS, if the user is deleted in LDAP, logging into the CMS is not allowed. But the user has to be deleted from CMS by a Super Admin
Click here for more information
SAML Users – An existing IDP can be configured and the SAML users can access CMS with their credentials
The profile information and password of SAML users cannot be modified from CMS. These modifications must be performed through the SAML IDP
Click here for more information