About this Article
This article provides information about the types of reports, how to schedule a report and how to view the generated reports.
Types of Reports
There are four types of reports that can be scheduled and generated in VSP CMS. All of them are generated in PDF format.
- Suspended Processes Report – Provides detailed information about the protection actions carried out by VSP Host Monitoring feature on the enabled hosts
- Summary Statistics Report – Provides information related to all attacks and/or threats distributed across various vulnerabilities and hosts (where they are detected). It does NOT provide information related to Host Monitoring attacks.
- Web Attacks Report – Provides detailed information related to all the web attacks detected for the configured applications across various vulnerabilities and hosts (where they are detected). Exclusive for Web Protection ONLY
- Host Monitoring Report – Provides detailed information related to all the process and library monitoring attacks detected for the configured hosts. Exclusive for Host Protection ONLY
Scheduled Reports
Reports can be scheduled by a CMS user as and when required. The report generation can be scheduled for any desired time frequency. To create/generate a schedule report, ensure that the user has “Create” permission for “Schedule reports” module and at least “Read” permission for “Report settings”.
Schedule a New Report
- Navigate to Report > Scheduled Reports in the left navigation pane
- Click SCHEDULE REPORT
- Provide the required information
- Report Name: Name of the Report. Ensure that the name does not have any special characters. Only “-“ [hyphen] and “_” [underscore] are allowed
- Report Type: Select one of the four types of reports from the drop-down
- Application(s): Select all the required applications from the drop-down list
- Report Period: Time Duration to be considered for the Report generation. Example: Last 10 Day(s)
- Max # of Reports to keep: Define the maximum number of previously generated reports (same scheduled report) to be maintained by CMS. The previous ones are archived
- Schedule Status: Activate or de-activate the Scheduled Report using the toggle button. It provides the ability to create a Scheduled Report but activate it when required
- Schedule Information: Select the report frequency and provide other information (Hourly, Daily, Weekly, Monthly, Only Once)
- Click SCHEDULE
- The created Scheduled Report is listed on the Scheduled Reports page
Activate/Deactivate Scheduled Report
- Navigate to Report > Scheduled Reports in the left navigation pane
- The scheduled reports can be activated or de-activated using the toggle-button under Status
- Click YES on the pop-up window
Modify Scheduled Report
- Navigate to Report > Scheduled Reports in the left navigation pane
- Click Edit associated with the scheduled report
- Modify as required
- Click SAVE
Delete Scheduled Report
- Navigate to Report > Scheduled Reports in the left navigation pane
- Click Delete associated with the scheduled report
- Click YES on the pop-up window
Generated Reports
- Navigate to Report > Generated Reports to view all the VSP generated reports
- Reports can be downloaded, viewed or deleted
- They can be filtered based on any keyword, status, report type or time duration
- A thumbs-up in Status column depicts a successful report generation and a thumbs-down depicts an unsuccessful report generation
List all Reports associated with Scheduled Report
- Navigate to Report > Scheduled Reports in the left navigation pane
- Click Generated Reports
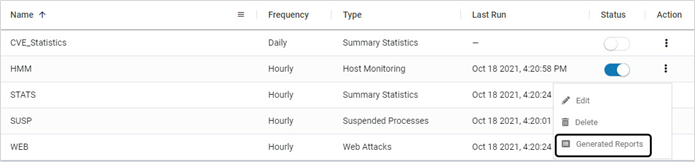
- All the reports associated with the selected scheduled report is listed
- All the listed reports can be downloaded or viewed using suitable links
- Reports can be deleted using Delete Reports. Click YES on the pop-up window
Instant Report Generation
- This feature can be utilized to generate a report immediately and not according to the expected schedule
- Navigate to Report > Scheduled Reports in the left navigation pane
- Click the Scheduled Report and click GENERATE NOW
- To view the generated report, navigate to Report > Generated Reports
New Report Type Addition and Report Template Modification
In cases of new report type additions and/or report template modifications, a complete VSP re-install is not needed. The new updates can be implemented in the current environment by following the steps below to import Virsec- provided .zip file:
- Download the .zip on the local server
- Navigate to Administration > Configurations in the left navigation pane
- Expand Report Settings and click IMPORT REPORTS. Only .zip files are allowed
- Select the file and click upload icon to commence the import
- Once the import is successful, click REFRESH REPORTS
- If a new report type is added, verify the addition:
- Navigate to Report > Scheduled Reports in the left navigation pane
- Click Schedule Report
- Verify the types of reports from the drop-down to ensure that the new Report Type is listed