About this Article
This article provides steps for the installation of Splunk (Ubuntu environment only) and how to integrate Splunk with VSP using CMS.
Splunk Installation
Follow the below steps to install Splunk
- Create a new VM for Splunk installation. Click here for Splunk installation criteria
- Download the Splunk installable for Ubuntu using the below steps:
- Navigate to the URL: https://www.splunk.com/ and click Free Splunk
- Sign up and click Software Download
- Download the installable as a .deb package (for Ubuntu) and copy the downloaded package to the newly created VM
- Log in to the newly created VM
- Install the .deb package using the below commands. Provide an appropriate username and password when promptedShell
sudo bash dpkg -i <filename>.deb - Start Splunk using the below commands:Shell
cd /opt/spunk/bin ./splunk start - Verification : Access the URL: http://<Splunk_IPAddress>:8000
- Log in with the user credentials configured during installation to display the home page
Virsec App Configuration in Splunk
Follow the below steps to install Virsec App in Splunk
- Virsec App is added to the Splunk App Store. Download the file virsec-security-platform-threat-dashboard_100.tgz from the URL: https://splunkbase.splunk.com/app/4143/
- Click Find More Apps
- Navigate to Apps > Manage Apps. Click Install App from File
- Upload the file virsec-security-platform-threat-dashboard_100.tgz from the local system. Click Upload
- Click Restart Now to restart the Splunk server
- Click OK on the confirmation pop-up message and click OK to display the login page
- Log in to Splunk again with valid credentials
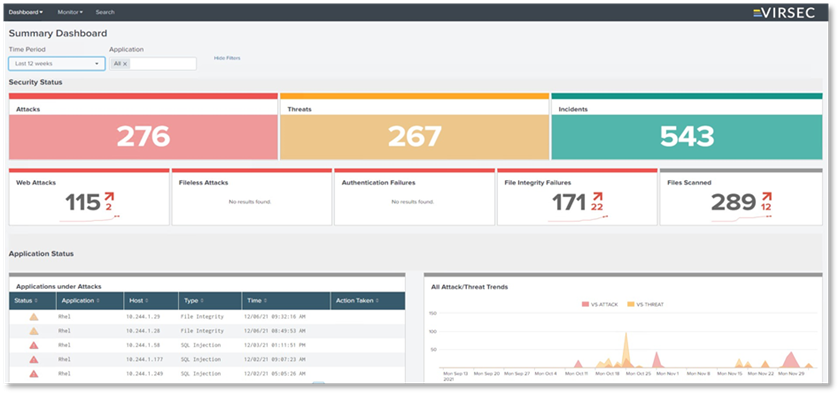
- Navigate to Apps > Splunk for Virsec. The below page is displayed

- Version 2.9 and Above: Splunk can be configured with SSL being enabled or disabled. By default, SSL is enabled,
- Follow the below steps to enable or disable SSL on the Splunk server:
- Navigate to Settings > Data Inputs. Click HTTP Event Collector
- Click Global Settings
- Version 2.9 and Above: Enable or disable the checkbox Enable SSL as required
- Versions 2.7 and 2.8: Ensure Enable SSL is unchecked
- For Version 2.9 and Above: If a switch from HTTPs to HTTP is required, follow the below steps:
- Disable the checkbox of Enable SSL on the Splunk server
- Delete the Splunk configuration from Administration > Configurations in CMS
- Add the below property in the file: /opt/virsec/cms/z-server/config/application.properties in the siem-splunk-service container:Text
siem.splunk.config.event.collector.disable.certificate=true - Restart the siem-splunk-service using the docker command:Shell
restart siem-splunk-service - Reconfigure the Splunk information in CMS under Administration > Configurations
- During upgrade from lower versions to VSP 2.9 or Above, follow the below steps:
- Enable the checkbox of Enable SSL on the Splunk server
- Delete the Splunk configuration from Administration > Configurations in CMS
- Reconfigure the Splunk information in CMS
Splunk Configuration in CMS
NOTE
- Port number supported is 8089
- Splunk displays the information related only to those threats, attacks and notifications detected by VSP AFTER the below configuration is complete. Any incident detected by VSP prior to the configuration is NOT available on Splunk
- Splunk connection using proxy with RootCA configuration is not supported
A super admin can add information related to Splunk server as below:
- Navigate to Administration > Configurations in the left navigation pane
- Enable forwarding to Splunk and provide the IP Address, Port number, username and password
- Click CONNECT