About this Article
This article provides information about the Web Profile including workflow, creation, modification and deletion of Web Profiles.
Why are Web Profiles Created?
Web Profiles are created to define the HTTP Profile, Custom Rules and exceptions (for a specific vulnerability type) during VSP Monitoring. The HTTP profile and custom rules provide the capability to customize VSP-Web (on Web Server) as required.
Each profile can be associated with one or more exceptions/custom rules. The created profile is associated with the process collective of an Application.
Once a Web Profile is created and associated with a process collective, requests matching the exceptions are not flagged as threats or attacks in CMS. This feature is provided to enable the user to flag a specific request type as “Not a threat/attack” or an “Exception”.
Web Profile Workflow is depicted below:
Create Web Profile
Create a Web Profile on CMS as described below
Navigate to Manage > Web > Web Profiles in the left navigation pane. Click ADD PROFILE
Provide a suitable Web Profile Name and Click NEXT
HTTP Profile
NOTE:
Ensure that the vulnerability “Protocol Enforcement” is in the Application during Process creation. If it is not selected, the configured parameters are not enforced by VSP-Web (on Web Server) on the requests.
Navigate to the tab HTTP Profile
Define constraints on the HTTP protocol elements as described in the table below:
Parameters
Description
Allowed Values
Allowed HTTP Versions
All the allowed HTTP version numbers. Example: HTTP/0.9, HTTP/1
NA
Allowed HTTP Methods
All the allowed HTTP Methods. Example: POST, GET, PUT
NA
Allowed Content Types
All the allowed Content Type values. Example: application/json
NA
Forbidden File Extension
Forbidden file extensions during File Upload. Example: .tmp, .exe
NA
Max Parameters
Maximum number of parameters allowed in both URL and request body
Maximum: 2048
Minimum: 0
Default: 256Max Parameter Name Length
Maximum length for any parameter name in URL and request body (in bytes)
Maximum:4096
Minimum: 0
Default: 256Max Parameter Value Length
Maximum length for any parameter value in URL and request body (in bytes)
Maximum:102400
Minimum: 0
Default:512Max Upload Files
Maximum number of file uploads allowed per HTTP request
Maximum:1024
Minimum: 0
Default: 20Max Upload File Size
Maximum size of file uploads allowed per HTTP request (in bytes)
Maximum:1024
Minimum: 0
Default:100The Profile can be enabled or disabled
The RESET button on the page resets all the fields to the last saved values
Click SAVE
.png)
Custom Rules
Navigate to the tab Custom Rules. Click ADD RULE
Select the Rule Type. There are three types of Rules that can be specified
Rate Limit Rule : When the number of requests matching the specified conditions reaches the configured threshold within the specified time, an incident is generated and the request is dropped/blocked
Allow Rule : Requests matching the specified criteria are allowed and no other rule-checks are applied. This rule takes precedence over the Block Rule.
Deny Rule : Requests matching the specified criteria are blocked and incidents are generated
If Rule Type selected is Deny, specify the Vulnerability from the drop-down. In case the vulnerability is not known, the value Custom Injection can be selected. If the selected Vulnerability is Stored Cross-Site Scripting, the value Applies To is HTTP Response. For all other Rule types and Vulnerabilities, the Applies To is HTTP Request
Provide the Rule Name and Description. The Rule can be enabled or disabled using the toggle button
Conditions can be specified using any one of the below editors:
UI Editor
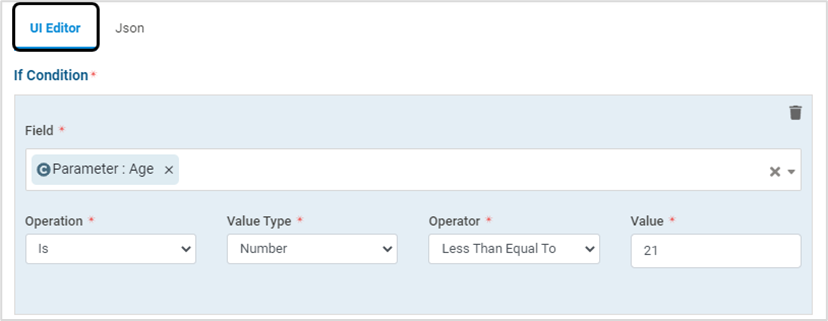
Json - Text/Form format

The condition Parameters are described in the below table:
Parameters
Description
Field
Select the required field(s) from the drop-down. Example: Parameter, Request Body
Operation
Select “is” OR “is NOT” from the drop-down
Value Type
Select the Value Type from the drop-down - RegEx, String, Number, IP Address OR Request Method
Operator
Select the required Operator from the drop-down – Match, Contains, Begins With, Ends With
Value
Specify the required value
NOTE:
For RegEx, the complete PCRE regex syntax is not supported (Intel Hyperscan library is the only regex syntax allowed)
Four operators can be configured in Custom Rule:
"contains" - matches anywhere
"begins with" - matches in beginning
"ends with" - matches at the end
"match" - exact match
For Rate Limit, provide the Threshold Criteria – Request Threshold (number of requests), Timespan (in secs), Count By (All sources/ per IP Address) and Source IP Header. Also provide the block duration in minutes
Click Add New Condition to add more conditions
The specified conditions are applied with the “AND” operator. If the operator “OR” is desired, add a new Deny Rule with the required condition
Click SAVE

Exceptions
Exceptions can be added from an incident or manually
Add Exception Manually
Navigate to the tab Exceptions. Click ADD EXCEPTIONS
Provide the Exception Name and Description. The Exceptions can be enabled or disabled using the Is Enabled toggle button
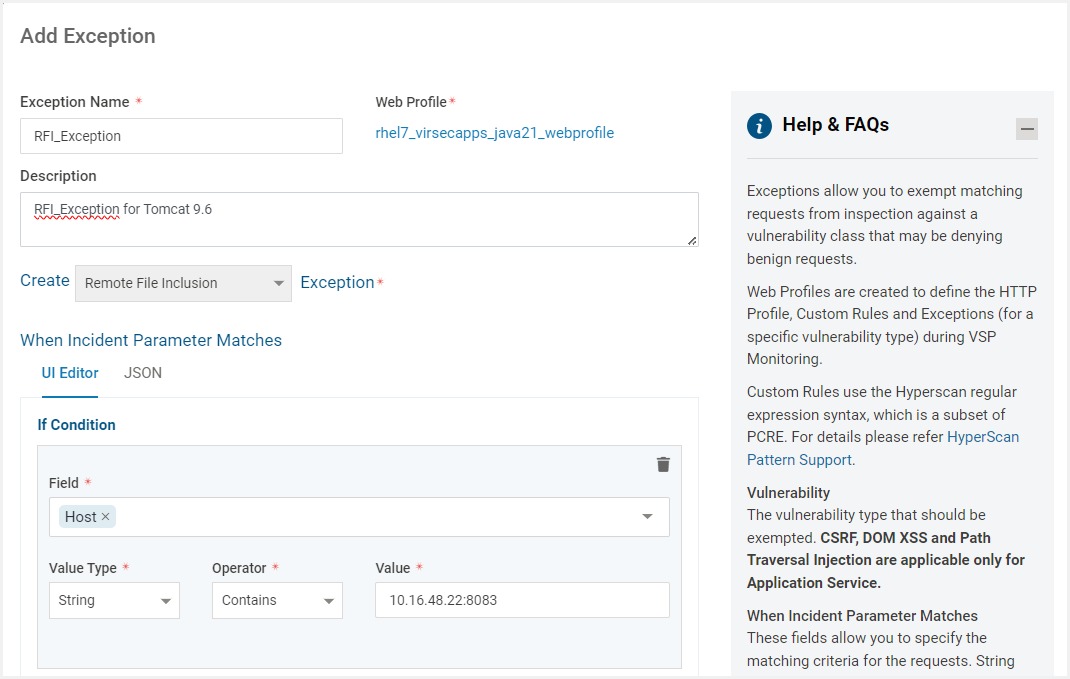
Select the Vulnerability Type to be exempted from the Create Vulnerability dropdown
The fields under When Incident Parameter Matches allows to specify matching criteria for the requests. Conditions can be specified using UI or JSON editor
The condition parameters are described in the below table:
Parameters
Description
Field
Select the HTTP component to be inspected from the drop-down. The Various HTTP Components include:
Source IP Address
Host - To match specific hostname or host value defined in the HTTP Host Header field
URI - To match URI value in the HTTP request.
Value Type
Select the Value Type from the drop-down - RegEx, String, Number, IP Address OR Request Method. The field type "Parameter" will accept only strings not RegEx
Operator
Select the required Operator from the drop-down. The options in the dropdown are determined by the Value Type. Four operators can be configured:
"contains" - matches anywhere
"begins with" - matches in beginning
"ends with" - matches at the end
"match" - exact match
Value
Specify the required value
Click Add New Condition to add more conditions with the AND operator
Click Save
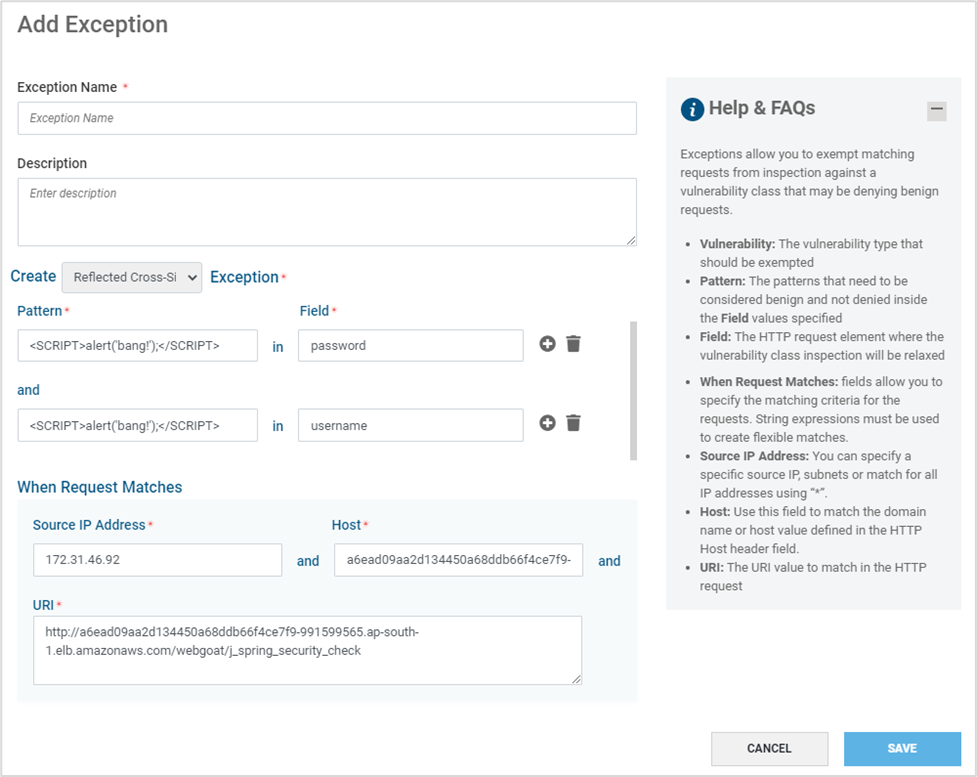
Navigate to the tab Exceptions. Click ADD EXCEPTIONS
Provide information as mentioned in the table below and click SAVE
Parameter
Description
Exception Name
Preferred name for the exception
Description
Suitable description
Is Enabled
Toggle to enable or disable the exception
Vulnerability
Select the Vulnerability type to be exempted from the drop-down
Pattern
Define the pattern to be exempted in the provided Field. Only string values are accepted and Regex patterns are not accepted
Field
The HTTP request element to be exempted for the selected vulnerability.
Note: Multiple Pattern and Field pairs can be added in a single exceptionSource IP Address
Specific IP Addresses OR subnets can be specified. If the exception is generic, include all IP Addresses using “*”
Host
Specific hostname or host value defined in the HTTP Host Header field
URI
Specific URI to match in the HTTP request
Add Exception from Incident
If undesired incidents are received, create exceptions for them to prevent receiving such incidents in the future
Click Add Exception on the required incident
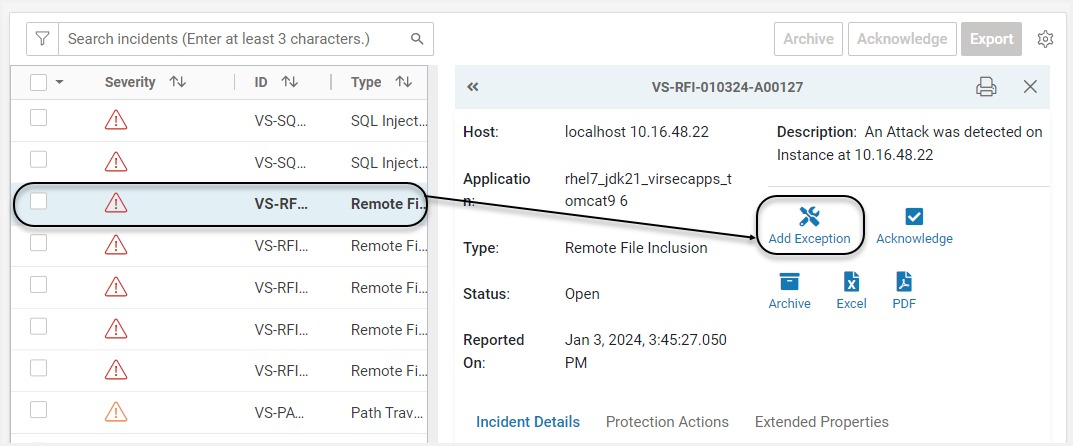
A pop-up with pre-populated values from the incident information is displayed. Modify conditions as required. Provide Exception Name and Description. Click Save
The exception is now added to the Web Profile associated with the affected process collective as reported in the incident
Exceptions can be enabled or disabled individually. If an exception is in disabled state, attacks/threats matching this exception criteria are still reported as incidents in CMS
Modify Web Profile
Navigate to Manage > Web > Web Profiles in the left navigation pane on CMS
To modify an existing Web Profile, click Edit

Web Profile name can be modified using the Edit option provided immediately after the Profile name
For Modifying HTTP Profile details, navigate to HTTP Profile tab. Modify as required and click SAVE
Existing Custom Rule can be modified, deleted or disabled using the below options
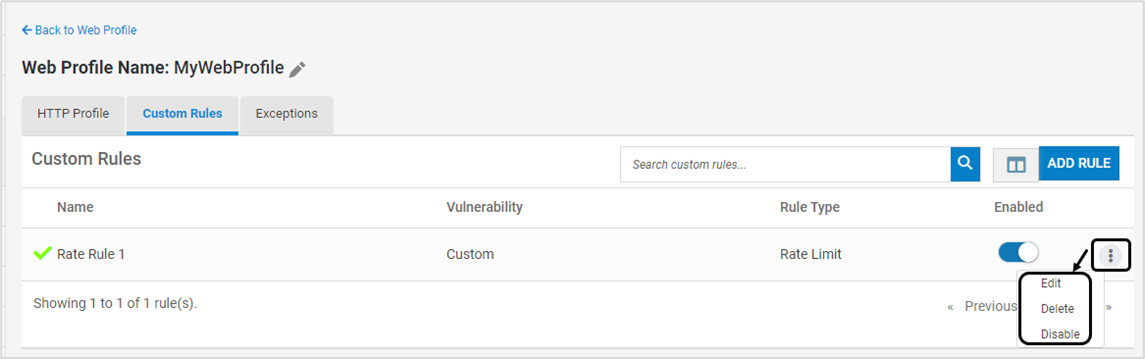
Existing Exception can be modified, deleted or disabled using the below options

Delete Web Profile
Navigate to Manage > Web > Web Profiles in the left navigation pane on CMS
To delete an existing Web profile, click Delete
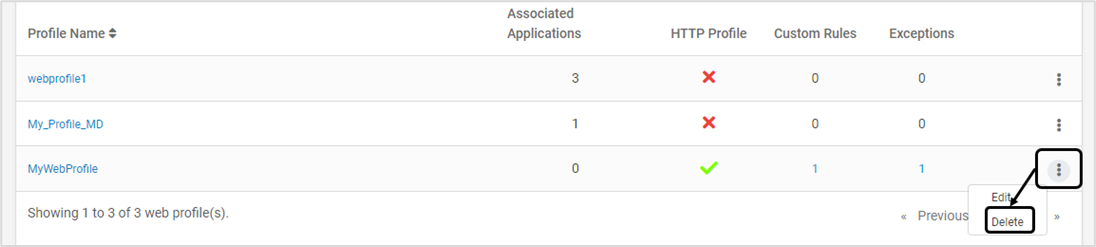
Click YES on the confirmation screen