VSP Web deployed on Web Server
VSP-Web component deployed on Web servers is “language stack independent”, providing greater compatibility with different Web servers. It is deployed as a filter with minimum/no instrumentation, supporting both VMs and Containers.
VSP-Web is deployed on the Web Server along with the standard VSP vRule (Embedded or Remote) components as depicted below: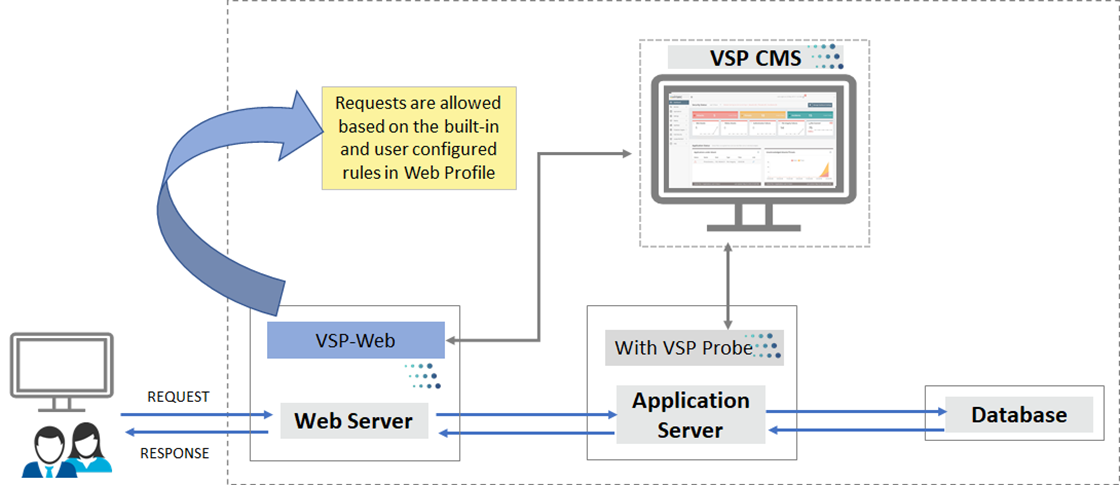
Web Services vs Application Services
The table below provides the vulnerability coverage comparison between Web Services and Application Services
| Vulnerability | Web Services | Application Services |
|---|---|---|
| Buffer Error | ü | |
| CRLF Injection | ü | ü |
| Cross Site Request Forgery (Beta Feature; Applicable only for Java and .NET) | ü | |
| Class Load Logging (Applicable only for Java and Node.js) | ü | |
| Command Injection | ü | ü |
| Custom Injection | ü | |
| DOM XSS (Beta Feature; Detect Only) | ü | |
| Local File Inclusion | ü | ü |
| Path Traversal Injection | ü | |
| Protocol Enforcement | ü | |
| Reflected Cross-Site Scripting | ü | ü |
| Remote File Exclusion | ü | ü |
| SQL Injection | ü | ü |
| Software Exception Logging | ü | |
| Stored Cross-Site Scripting | ü | ü |
| XML Injection | ü | ü |
Web Protection Workflow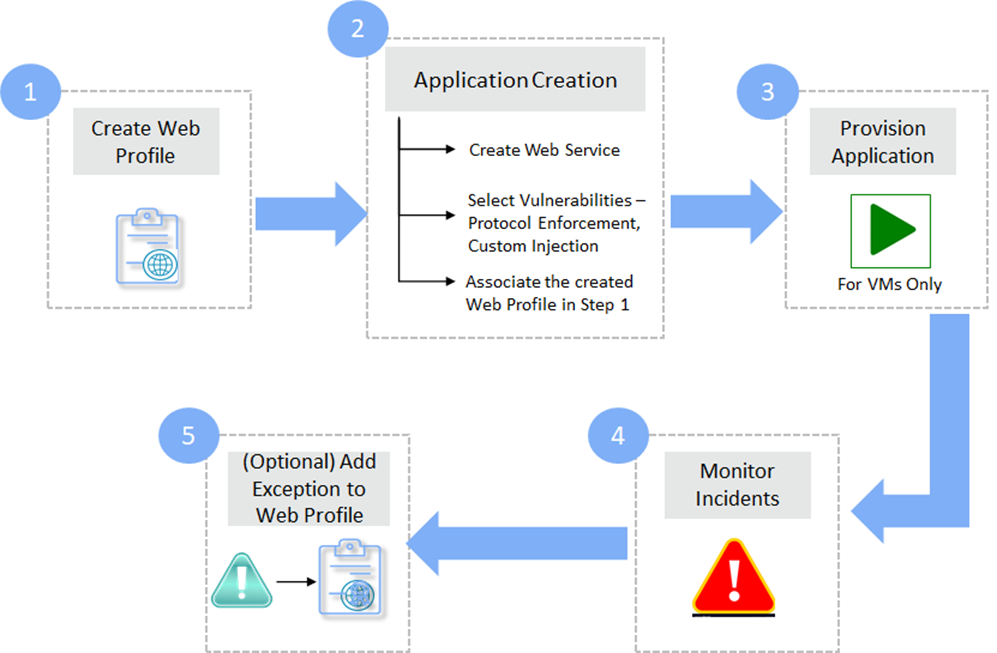
VSP Web can be deployed on Web Server using the below steps
- STEP 1: Create Web Profile
- STEP 2: Application Creation
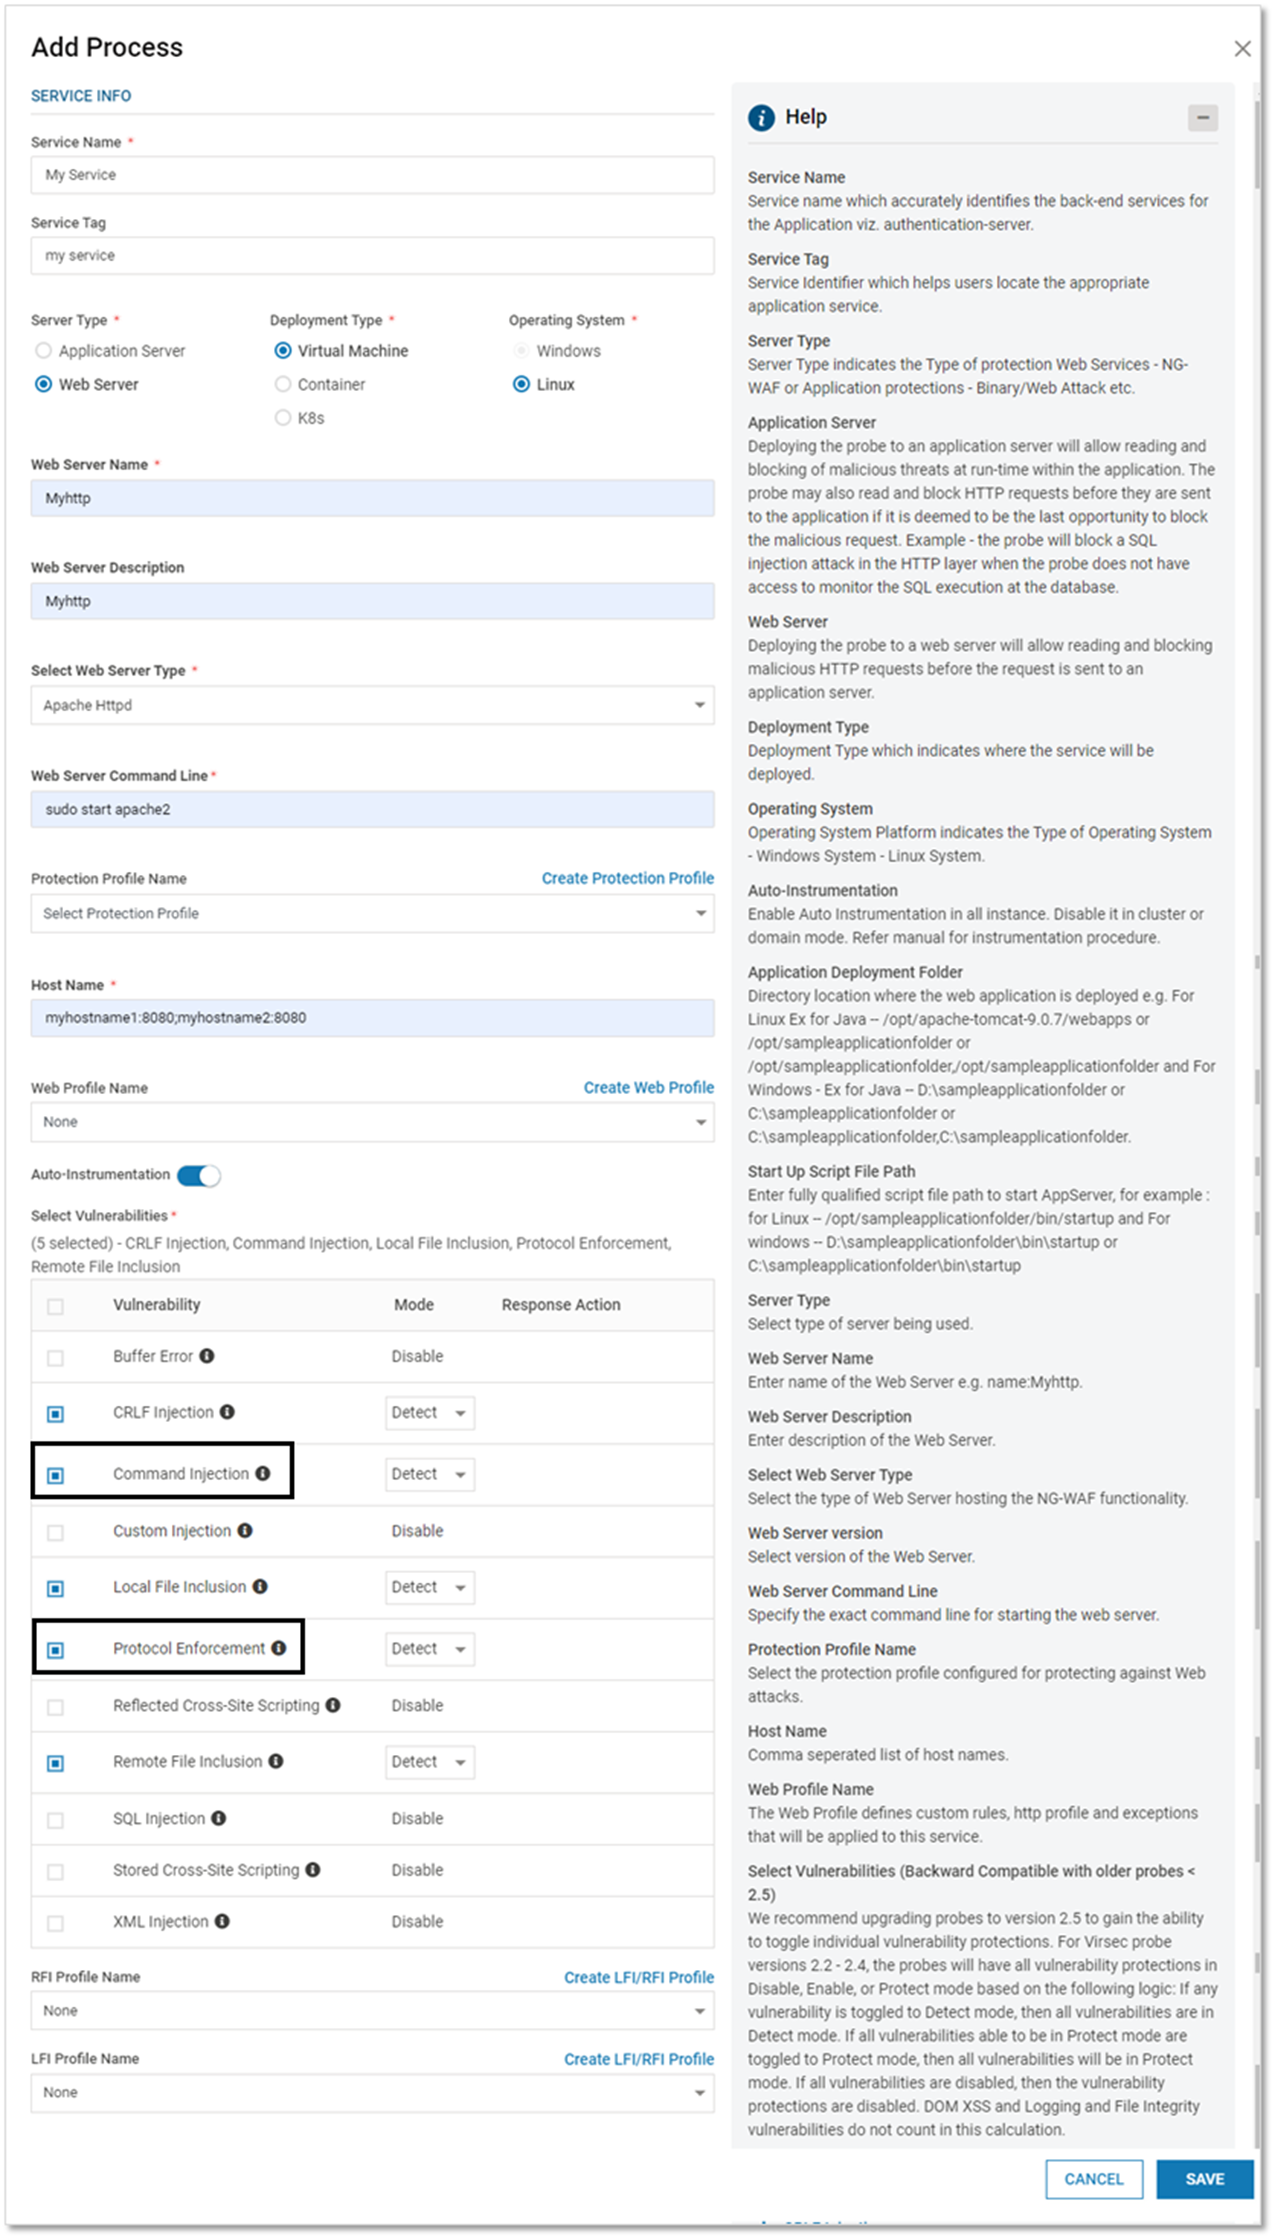
- Navigate to Manage > Web > Application Provisioning in the left navigation pane of CMS. Click ADD APPLICATION
- Provide Application (Name) and Version (Optional). Click NEXT
- Select the Server Type as Web Server
- Provide the below information
Field Name Description Web Server Name Name of the Web Server Web Server Description Short description of the Web Server Web Server Command Line The exact command for starting the Web Server.
Examples: service httpd start (For Apache); service nginx start (For Nginx)Protection Profile (optional) Select the appropriate Protection Profile from the dropdown
Host Name List of all the associated host names separated by comma Web Profile Name Select the appropriate Web Profile from the dropdown
Select Vulnerabilities Select the vulnerabilities against which VSP-Web (on Web Server) Protection is desired. The protection level can be configured for each vulnerability. By default, when a vulnerability is selected, the associated protection mode is set to Detect
Note: For HTTP Profile, ensure that Protocol Enforcement vulnerability is selected. If any Deny rule is configured for Custom Injection, ensure that it is selected
- STEP 3: Provision Application
- For VMs, ensure that the appropriate Instances are associated with the Application and it is secured using the below button

- For containers, the instances are automatically associated and the Application is secured
- For VMs, ensure that the appropriate Instances are associated with the Application and it is secured using the below button
- STEP 4: Monitor Incidents – Based on the configured rules, the HTTP requests are allowed/blocked. The blocked requests are reported as incidents. To view the incidents, navigate to the below page in the left navigation pane
- Version 3.1.1 and Above: TrustGuardian > Incidents
- Version 3.1.0 and Below: Monitor > Incidents
- STEP 5: Add Exceptions – If undesired incidents are received, create exceptions for them to prevent receiving such incidents in the future. Refer Exceptions in Create Web Profile for more information
Use Cases
Below are a few of the VSP-Web use case scenarios where VSP-Web can be deployed on Web Server
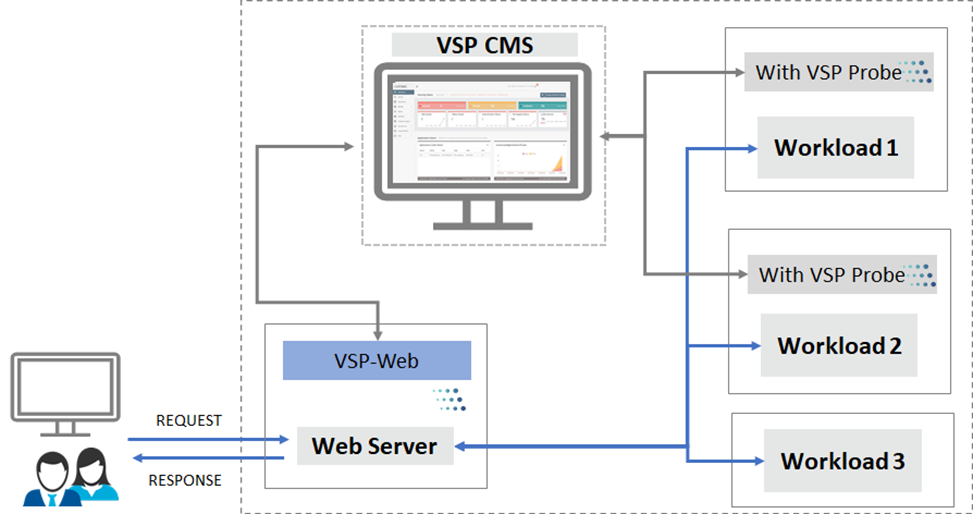
- In cases where VSP-Web is not compatible with the Customer workload, VSP-Web (on Web Servers) can be utilized to provide VSP security

- In cases where VSP-Web is partially compatible with the Customer workloads, VSP-Web (on Web Servers) can be deployed to achieve complete coverage. In the diagram below, Workload 1 and Workload 2 are secured by VSP-Web (on Application Server). For Workload 3, VSP-Web (on Web Servers) can be utilized